

how i make my ms paint drawings
ft. the manta ray i drew on day 3

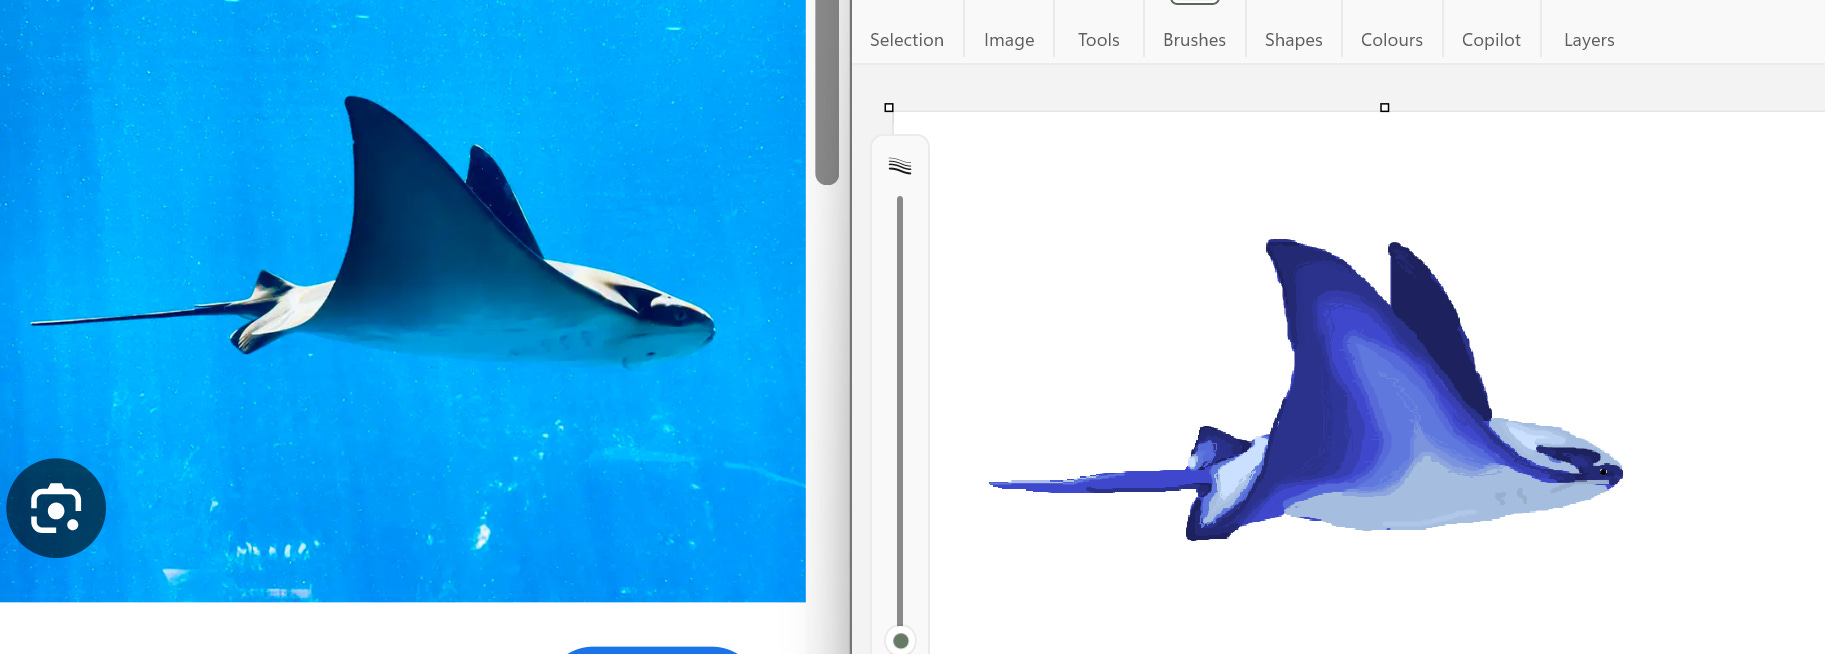
Hi! If you don’t know me, my name is bea! Some of you might recognise me from my mitski post, or my recent series where I draw sea animals in ms paint. Today, I’ll be sharing my process and how I make these little drawings!
Step 1 - the rough sketch
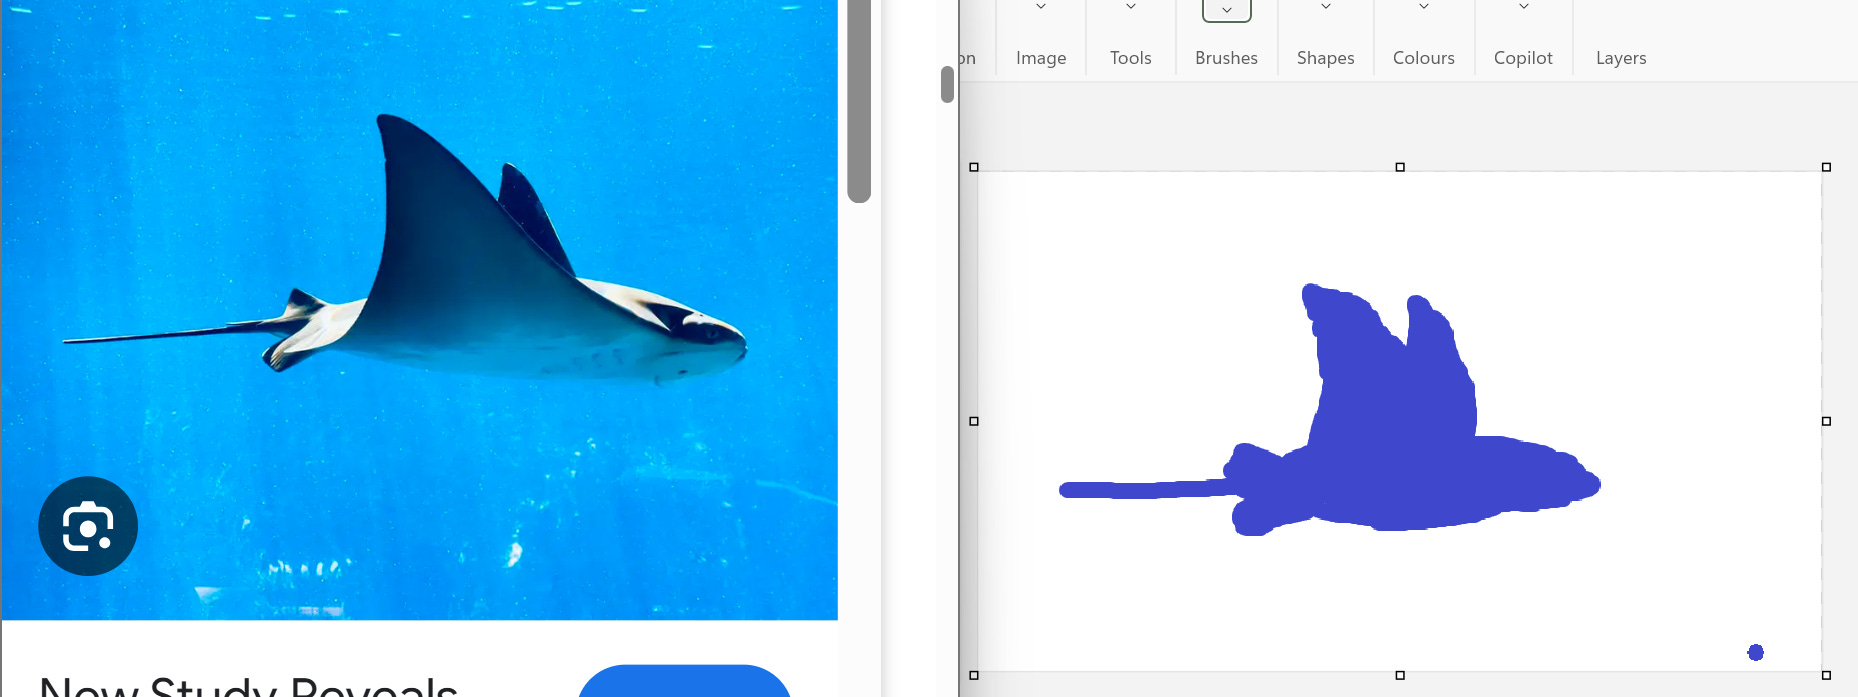
First, I find a reference picture that calls to me. Usually, its a photo with nice lighting and enough contrast in the highlights and shadows. Once I’ve decided on a picture, I do a rough sketch with a default brush thickness of 20 pixels or so to block out the shape. I don’t try too hard to make it accurate at this point, usually just picking one of the default colours as my base.
Step 2 - Shadows
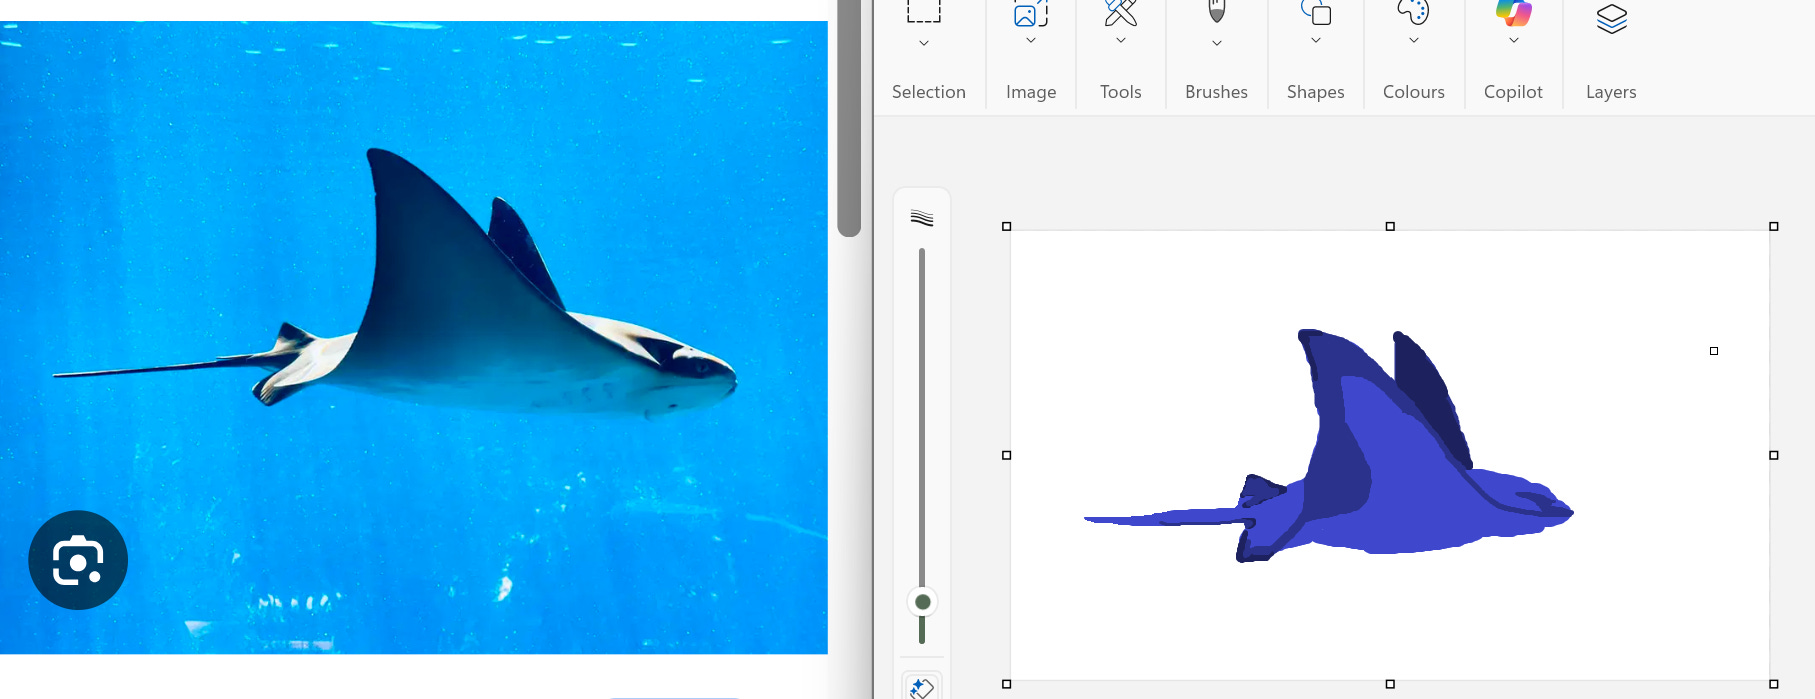
Next, I add shadows - building off the base colour to get the most extreme darks into place. Sometimes, I go through and make these darker after I add the highlights, or blend them out. In this drawing, I do both of those.
Step 3 - Highlights
After the shadows, I add the lights into the piece. This helps shape the drawing, and give it a more realistic form. If it looks a little rough at this stage, thats completely fine, this can be cleaned up in the blending stage. Since these colours are so contrasting, I will be blending them together. I didn’t do this for the whale shark as the dots covered most of the details up, I only did it slightly on the seahorse. This is the first time I am blending on ms paint, so if it looks a little off, I’m still learning!
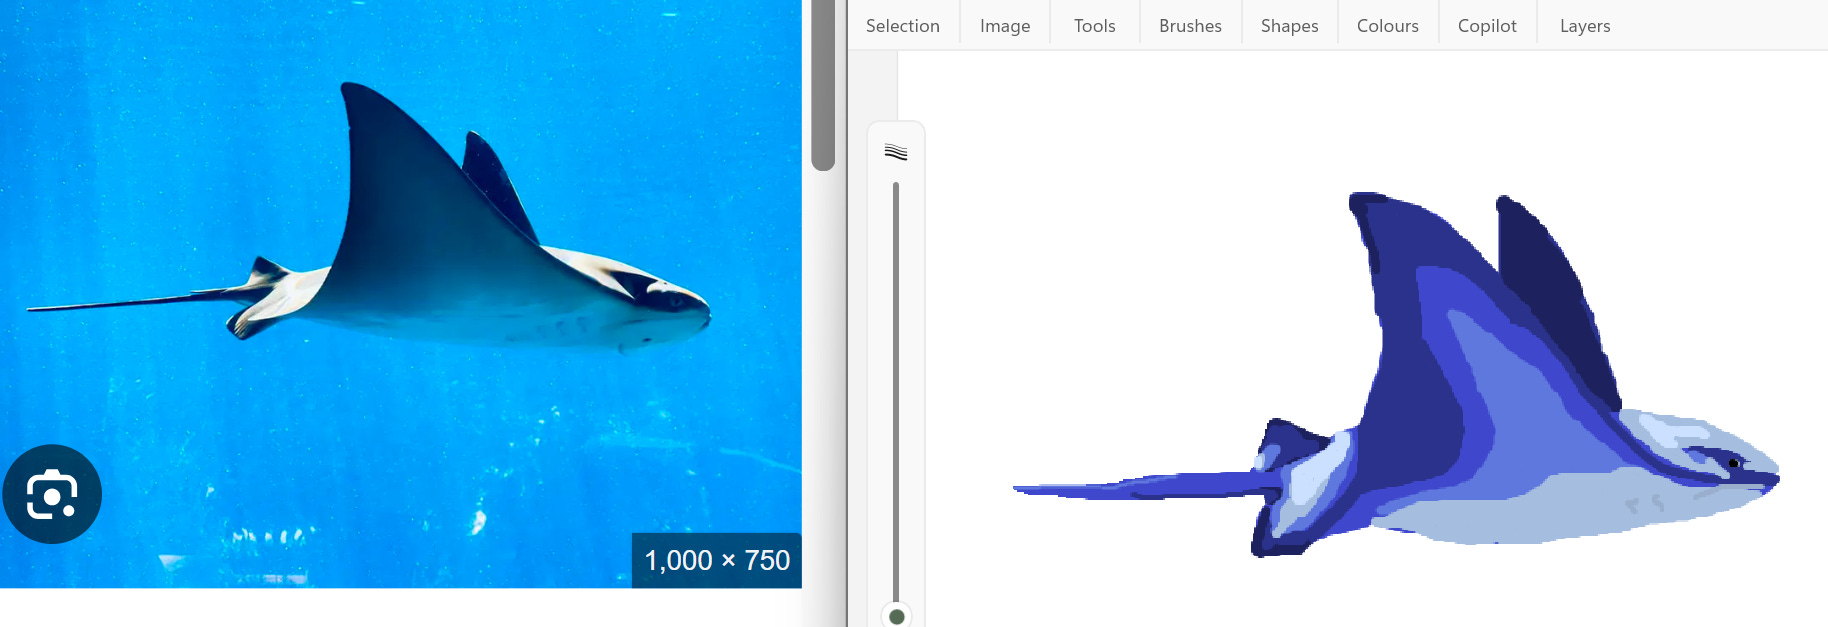
Step 4 - Blending
After I add all the depth, I go back and use the eyedropper tool to pick colours in between to help smooth the transition. I’m not entirely happy with the transitions for this - which is ok as I’ve never tried this before and the whole point of this is to learn and grow as an artist! I do know a technique that might help with the shading, and that’s scribbling!
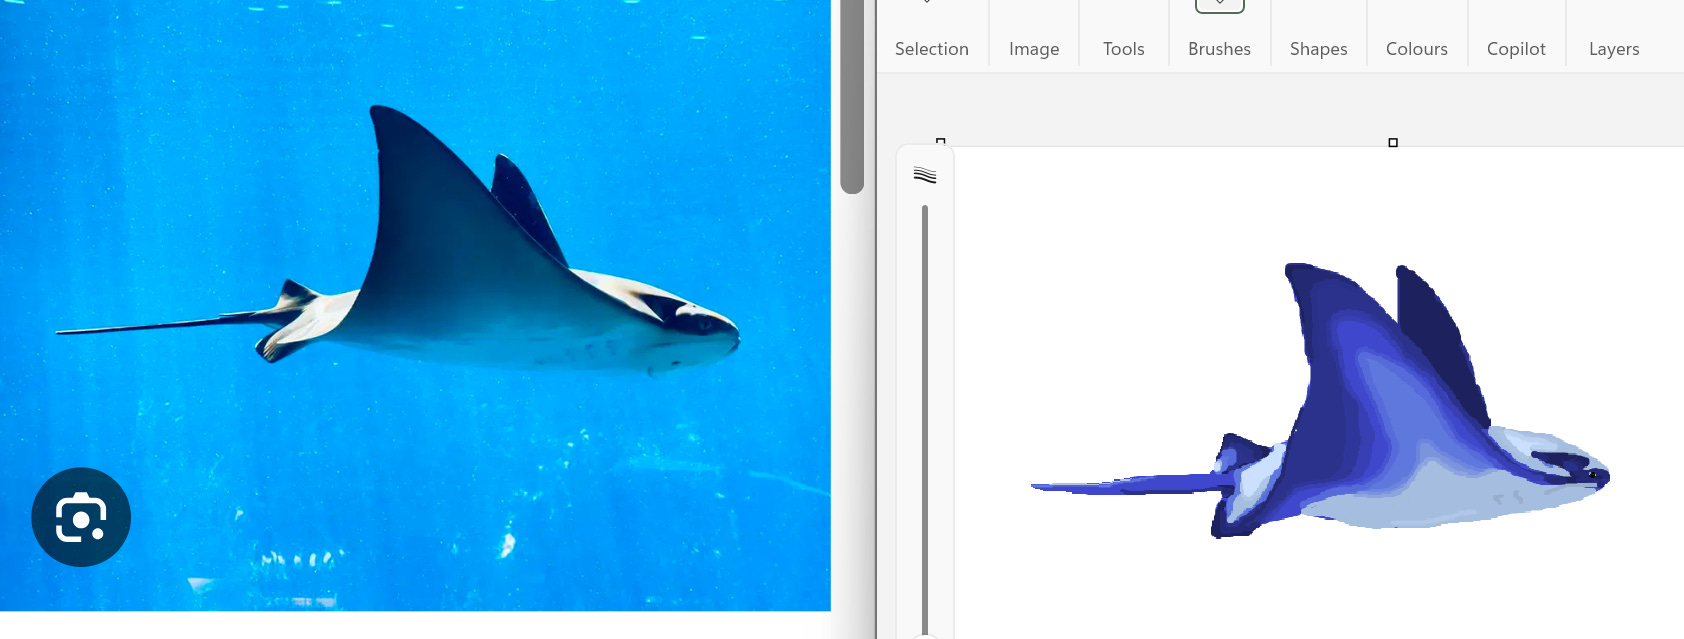
Step 5 - Scribbles
To break up the monotony of the blending, I add little scribbles around the edges to help add visual variety. You can’t really notice the changes, but it definitely helps with the more natural feeling I was trying to create. It’s not the most perfect drawing, but I really wasn’t trying to make it perfect. The whole point of this project is to improve at my digital art, not to create masterpieces.
Final Work

And here it is! I hope you guys enjoy a look into my processes, and that this maybe inspires you to try digital art! If you feel discouraged in any way or overwhelmed, remember that learning takes time. I’ve been drawing digitally since about 2018, and its taken years of practise to get here. But yeah, have fun, get inspired and go make art!
queen
Your drawings are so cute!!!